
rattleCAD 4.0 - Custom Components
What is it for?
This page gives you an introduction how to integrate own components into rattleCAD 4.0.
Content of this page
- Abstract
- Required Tools
- Preface
- Cleanup your source SVG-File
- Outer Shape, Inner Shape and Origin
- Prepare SVG-File for use in rattleCAD 4.0
Abstract
You have a specific dropout (component) and you want to use it in rattleCAD. rattleCAD uses a specific SVG-Format and you have to create a representation of your specific dropout (component) in the required SVG-Format.
In any case you need a digital representation of your dropout:
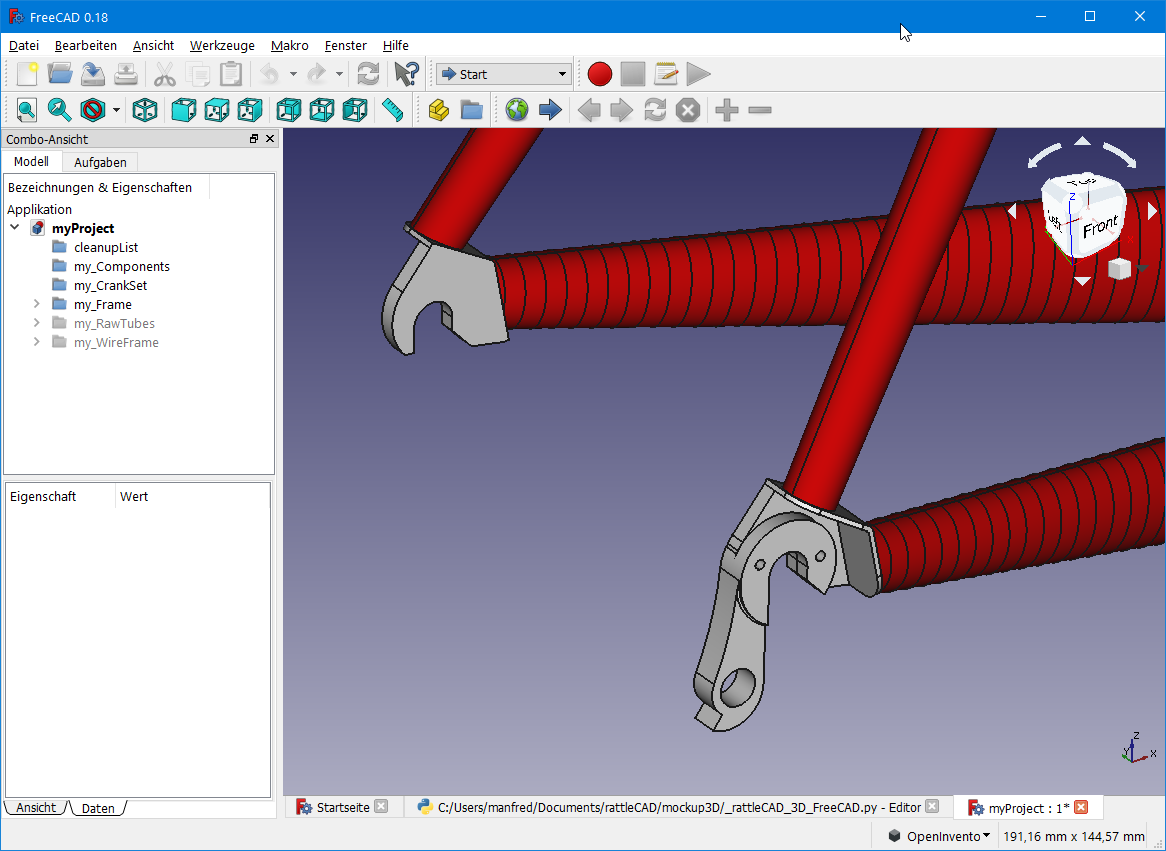
- as a 3D-Model
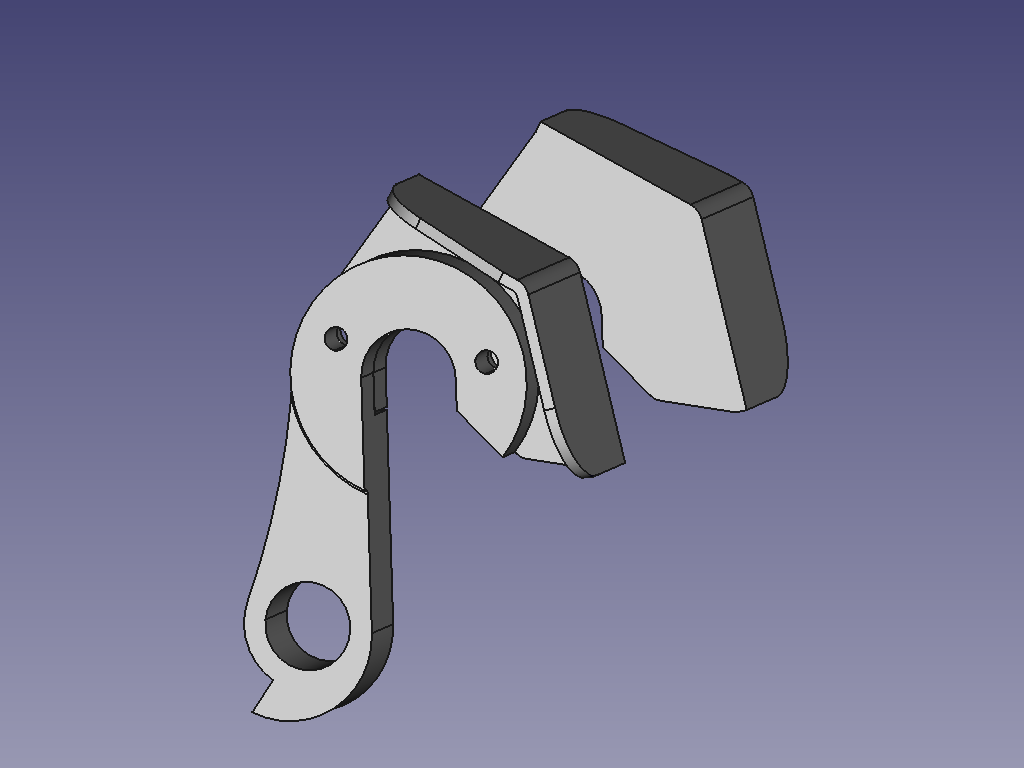
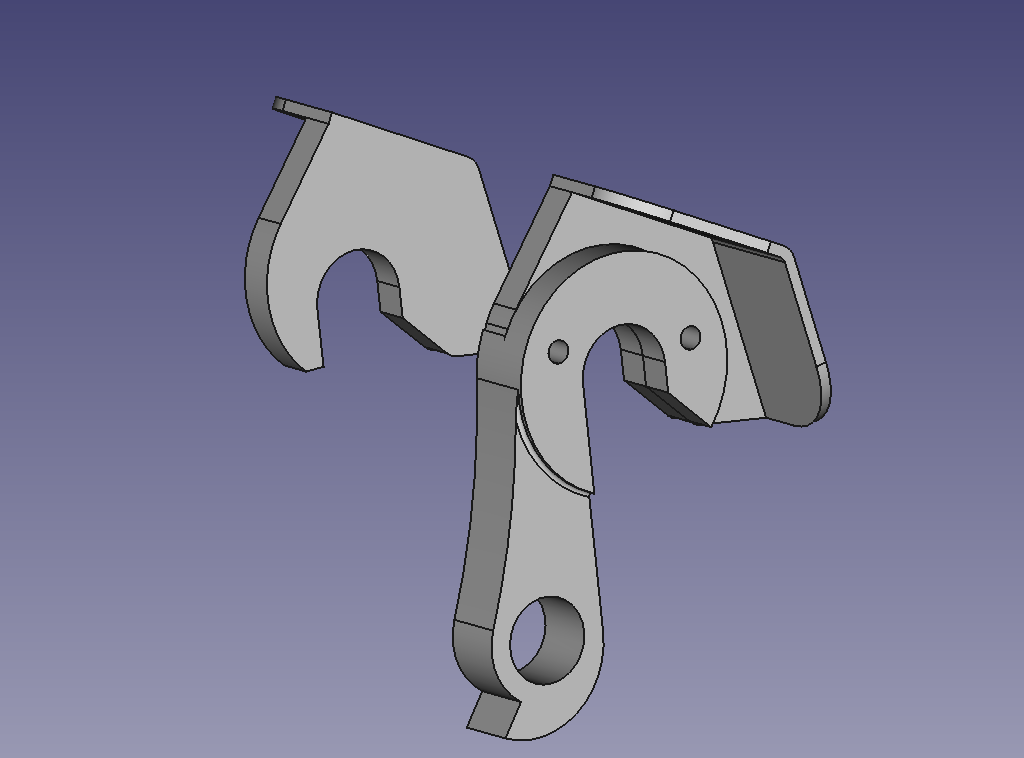
3D-Model built in FreeCAD.
- ... or at least as a 2D-Drawing in different formats (e.g: SVG, DXF, WMF, ...)
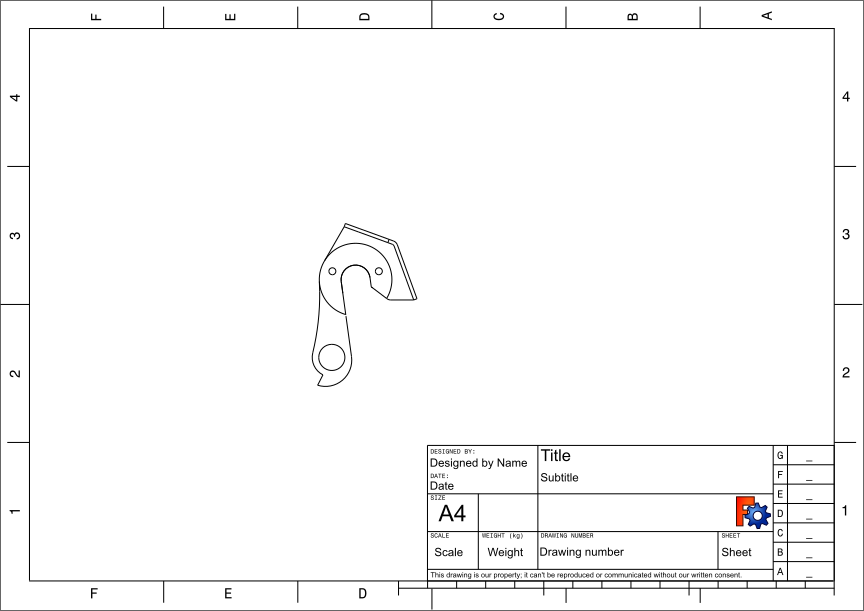
2D-Drawing of the 3D-Model above built in FreeCAD.
- ... to be represented in rattleCAD 4.0
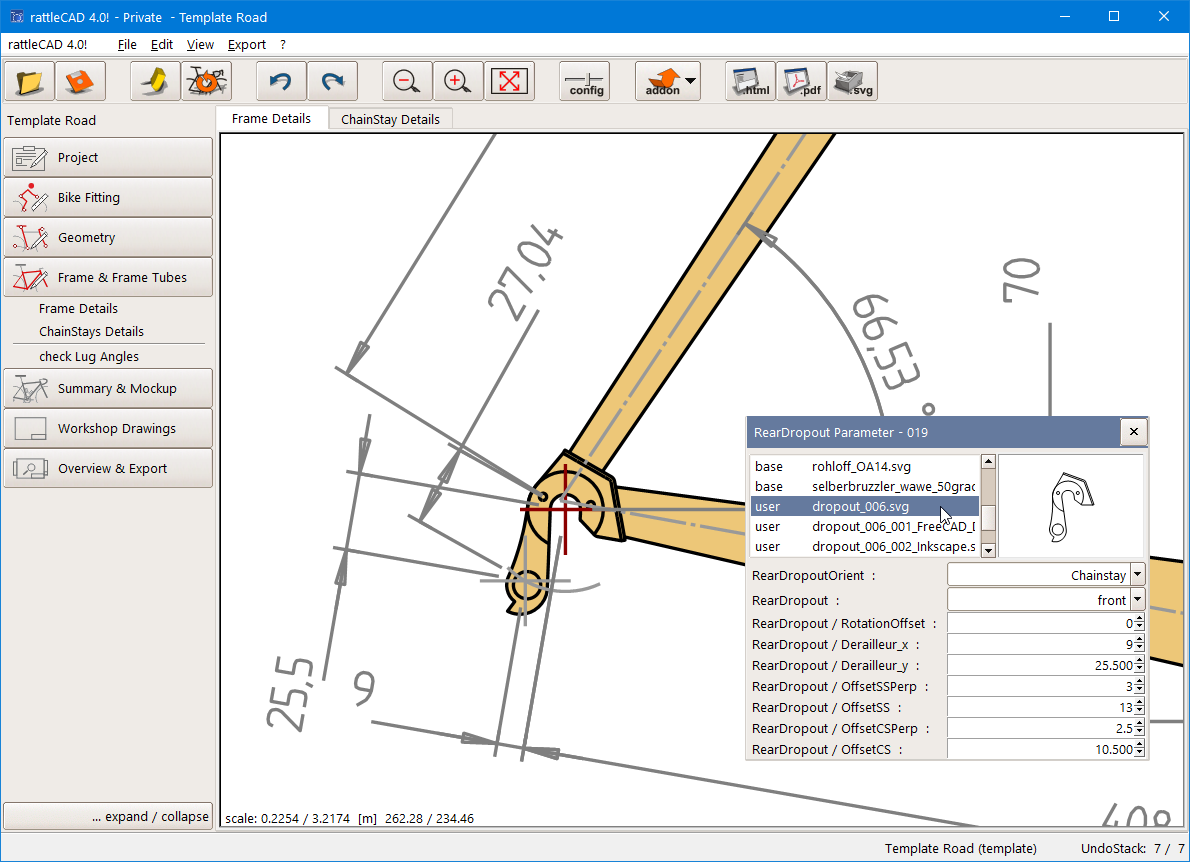
2D-Representation of your dropout in rattleCAD.
Required Tools
For this manual you will maybe use this tools:
- 3D CAD-Modeller
- SVG-Editor
- rattleCAD 4.0
Preface
In our use case our component is a rear dropout named dropout_006.
To use your dropout component you need at least this files in your components directory:
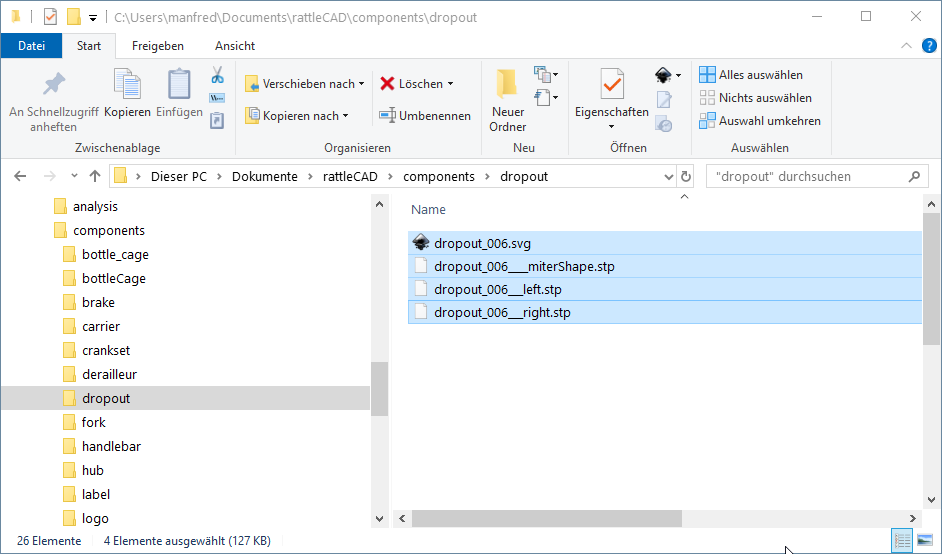
- Result (2D): dropout_006.svg SVG-File to be used in rattleCAD 4.0
- Result (3D): dropout_006___right.stp right side dropout to be used in the plugin: mockup-3D using FreeCAD
- Result (3D): dropout_006___left.stp left side dropout to be used in ...
- Result (3D): dropout_006____miterShape.stp dropout cutting shape ...
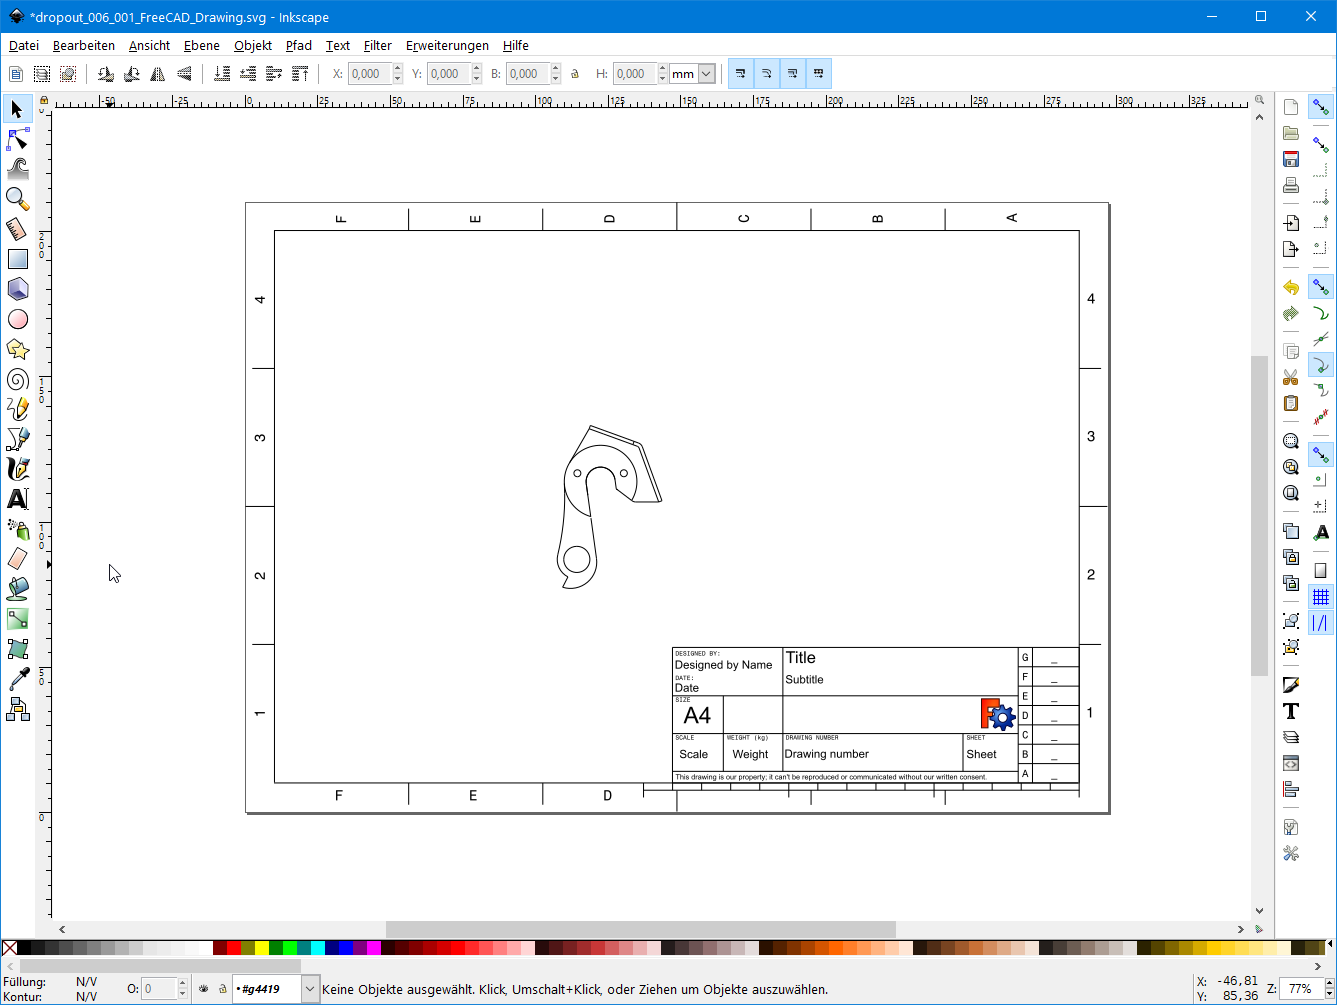
The source for our component preparation is a SVG-File exported from FreeCAD

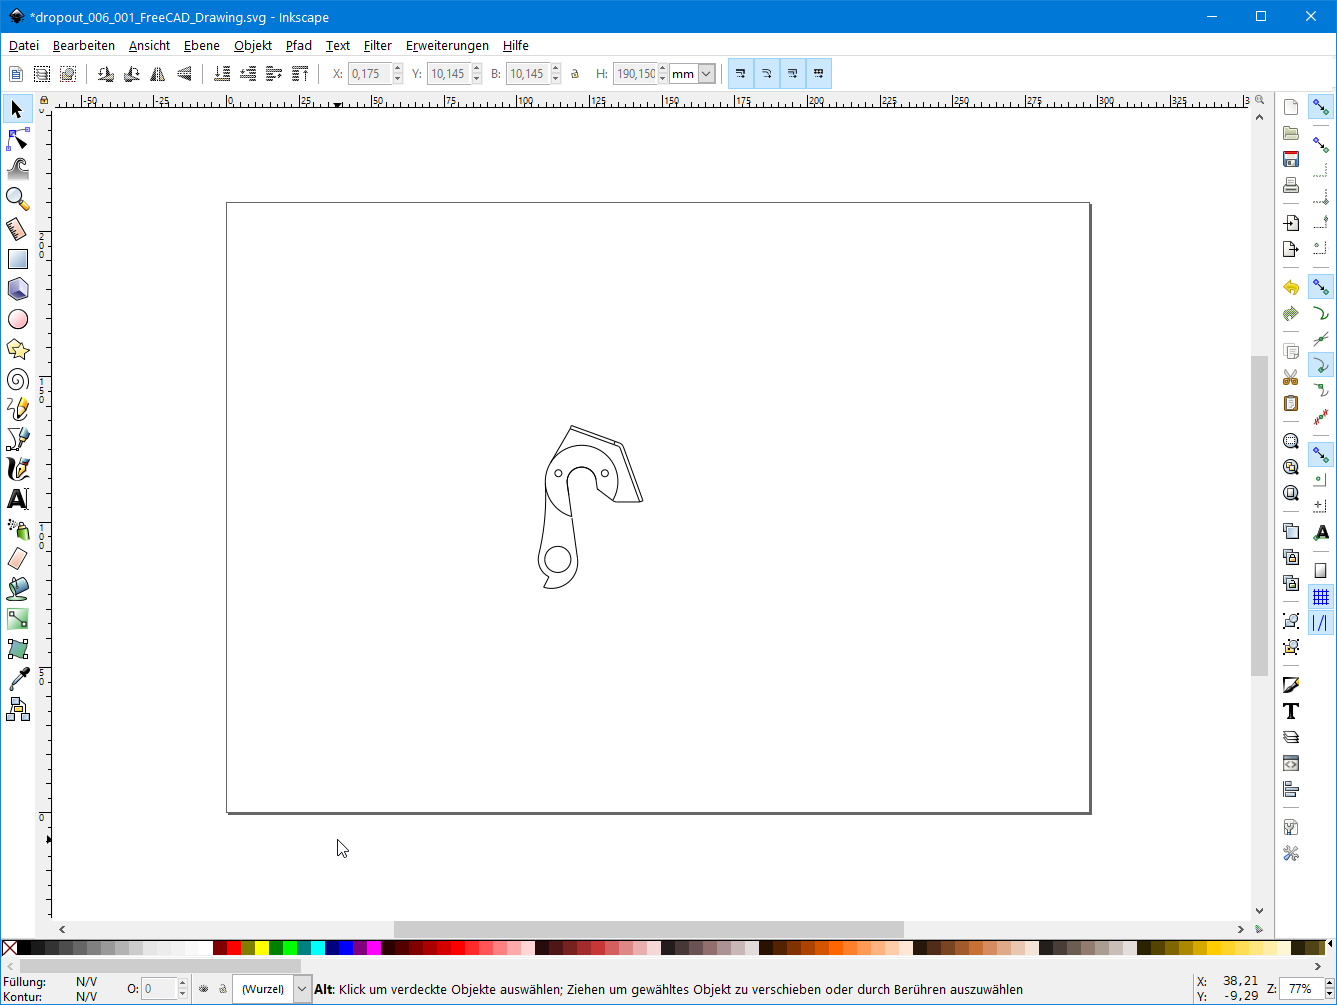
Source: SVG-File dropout_006_001_FreeCAD_Drawing.svg
Cleanup your source SVG-File
- Step 1: SVG cleanup dropout_006_002_Inkscape.svg
- Step 2: SVG export as WMF dropout_006_003_Inkscape_wmf.wmf
- Step 3: import WMF into new Inkscape File dropout_006_003_Inkscape_wmf.svg
Preface
As you can see our source file does contain much more details as required for the use in rattleCAD. In this phase we remove all these
unused objects from the drawing and prepare the required objects for later use.
Step 1: Remove unnecessary objects
All we need from the graphic above are the objects that describe our dropout.
Step 2 & 3: Convert the graphic for rattleCAD
For a specific reason we often cannot use the current SVG-File for later use.
Therefor I suggest:
- Step 2: to export your current SVG-File in Inkscape
to a WMF-Format.
dropout_006_003_Inkscape_wmf.wmf - Step 3: and import your previously exported WMF-File to a blank Inkscape project and save this file as a SVG-File dropout_006_004_Inkscape_wmf.svg
Why step 2 & 3?
Lets have a look on the SVG representation of the same object and compare this representations:
The representing path-element contains an A-attribute that cannot be solved by rattleCAD yet (rattleCAD 4.0-16).
In the target representation this element is converted into a polygon element.
The conversion to the WMF-Format and
the reconversion into a SVG-Format
in Inkscape solves this for us.
source: dropout_006_002_Inkscape.svg
                            <path

                                d="M12.0297 -3.39639 A12.5 12.5 0 1 0 6.50055 10.6767"

                                id="path256" />
target: dropout_006_004_Inkscape_wmf.svg
                            <path

                                id="path593"

                                d="m 449.76,409.36 -3.6,-1.12 -6.72,-3.12 -6.08,-4.08 -5.36,-4.96 -4.48,-5.68 -3.68,-6.24

                                    -2.56,-6.88 -1.52,-7.28 -0.32,-3.76 -0.08,-3.76 0.8,-7.44 1.92,-7.04 2.96,-6.64

                                    3.92,-6.08 4.88,-5.44 5.6,-4.64 6.4,-3.84 3.52,-1.44 3.52,-1.28 7.28,-1.6

                                    7.36,-0.4 7.2,0.64 7.04,1.84 6.64,2.8 6.24,3.84 5.6,4.88 2.56,2.88 2.32,2.96

                                    3.84,6.32 2.72,6.8 1.68,7.12 0.56,7.2 -0.56,7.28 -1.68,7.12 -2.8,6.88 -1.92,3.28"

                                style="fill:none;stroke:#000000;stroke-width:1.36000001px;stroke-linecap:butt;

                                    stroke-linejoin:miter;stroke-miterlimit:4;stroke-dasharray:none;stroke-opacity:1"

                                inkscape:connector-curvature="0" />
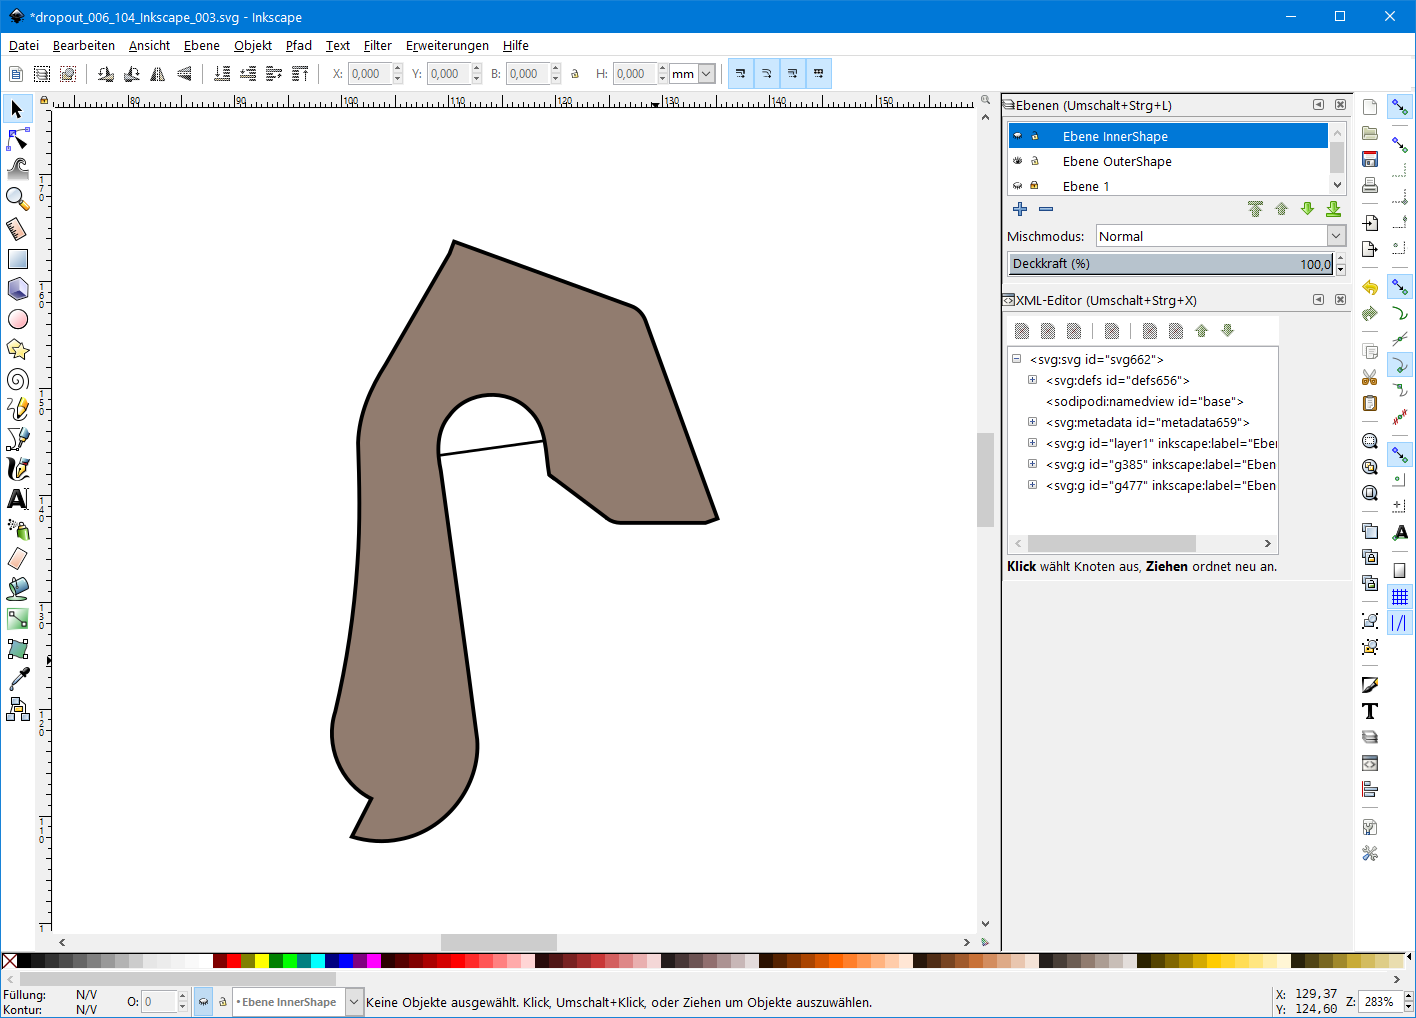
Outer Shape, Inner Shape and Origin
- Step 6: Shape and Origin dropout_006_104_Inkscape.svg
Preface
rattleCAD components require three important parts:
- Outer Shape
- Inner Shape
- and an Origin Position
Inkscape
Inkscape provides layers as a feature so that you can work on Outer and Inner Shape and keep your original graphic unchanged.
In the following screenshots you can see these layers on the top right named:
Ebene InnerShape, Ebene OuterShape and Ebene 1.
Step 4: Prepare Outer Shape
The Outer Shape is a closed Shape that can be filled with a color in rattleCAD 4.0
Step 5: Prepare Inner Shape
The Inner Shape consits of a several graphic elements. This elements represents the inner structure of our component
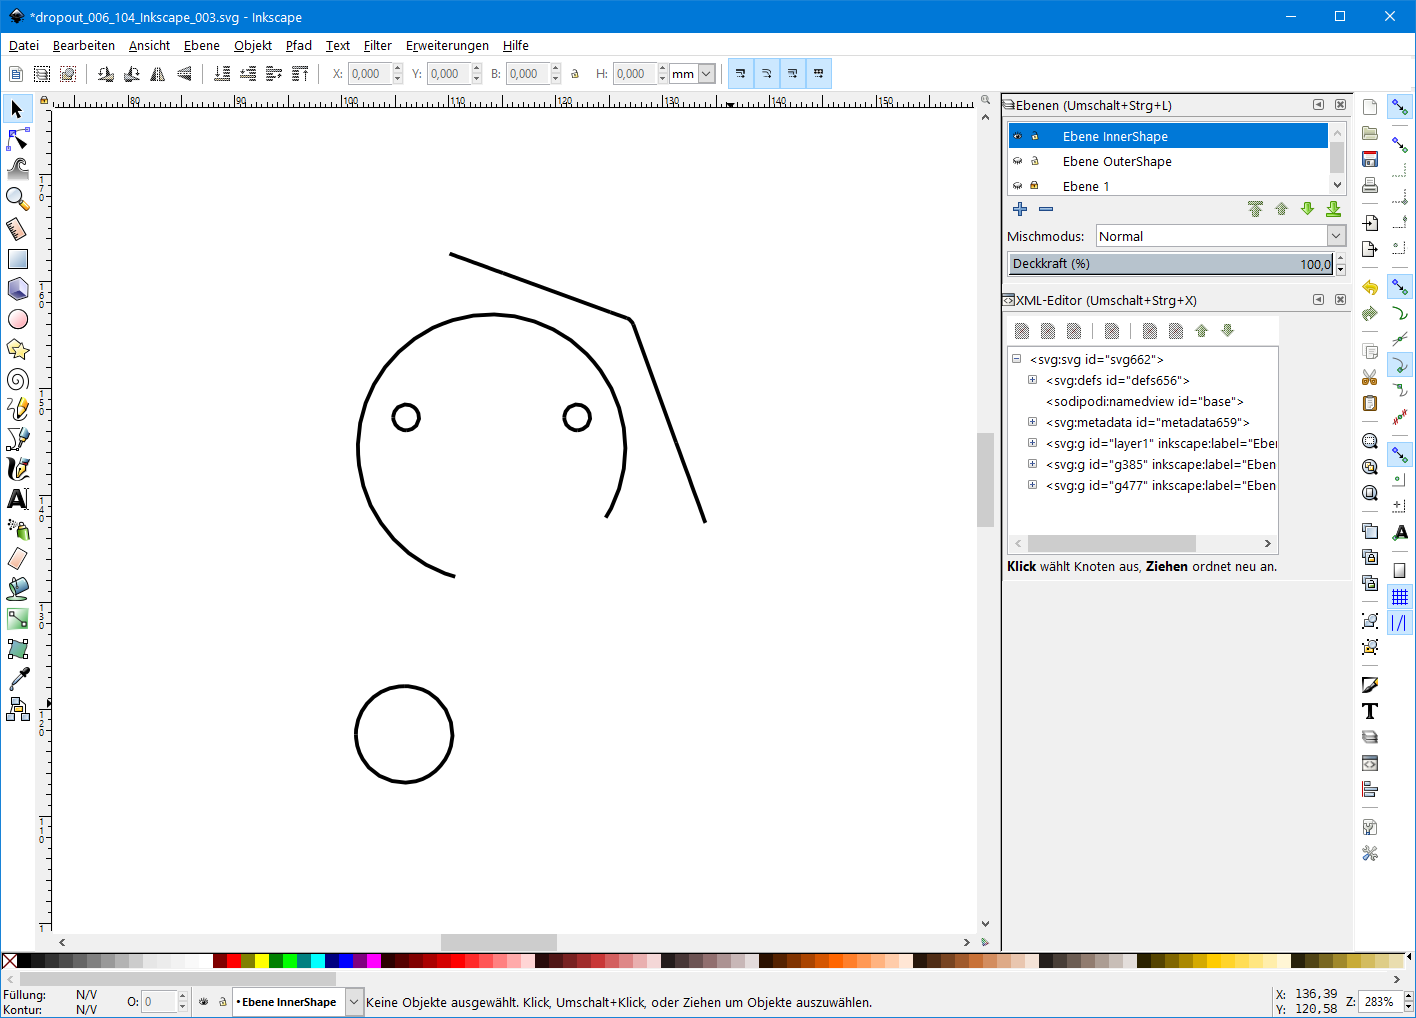
Step 6: Prepare Origin
For later positioning we need on object, which center could be used later on as the origin of our component
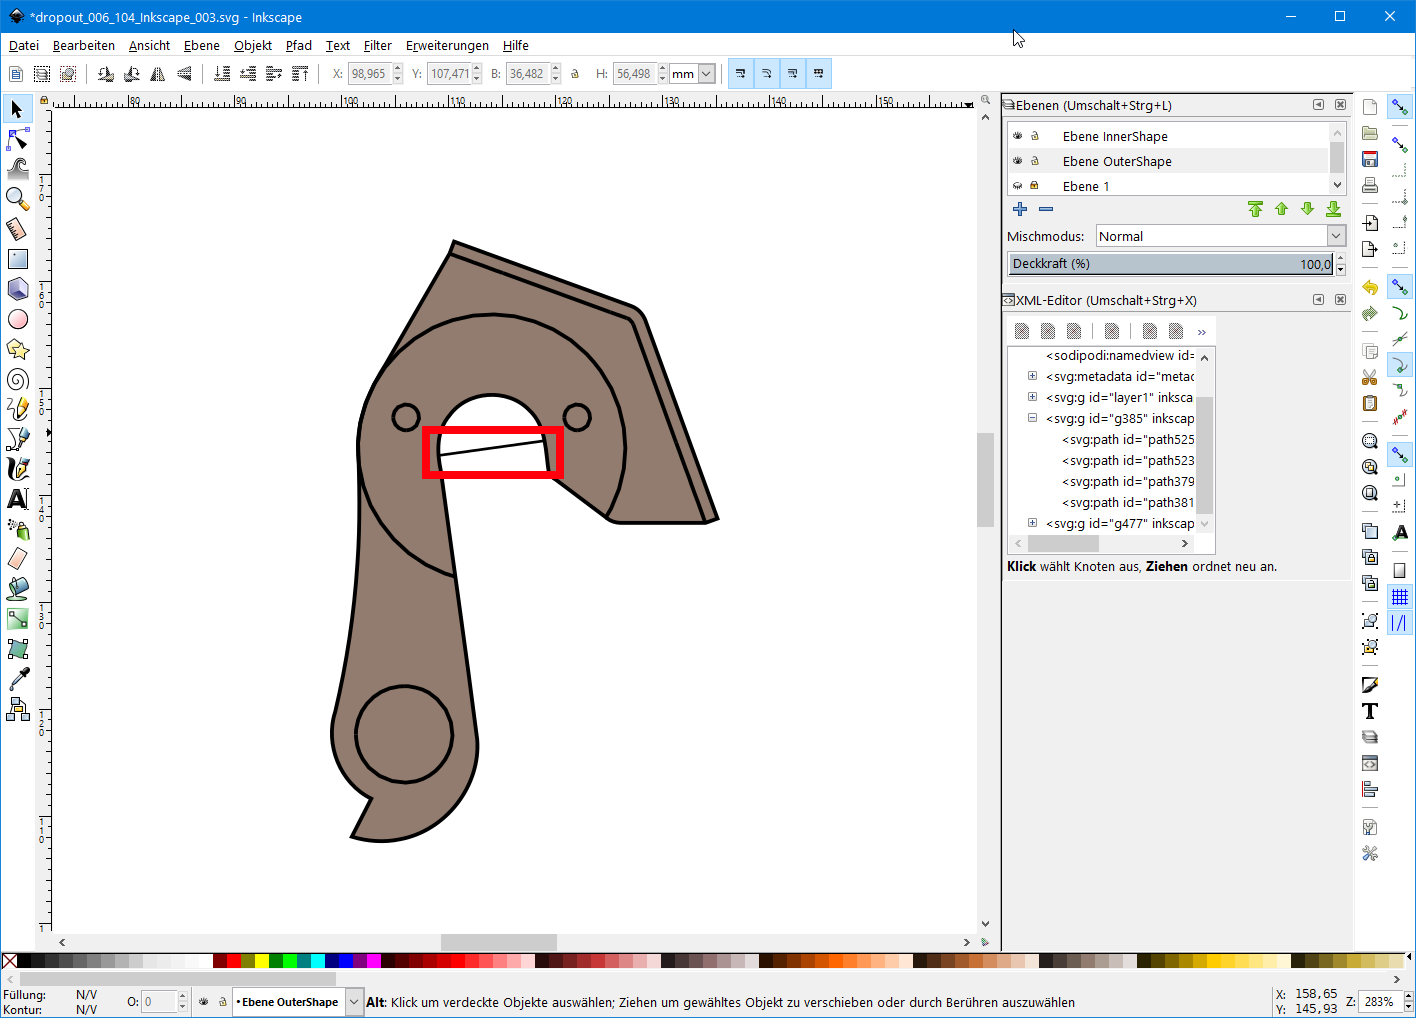
Result
The Result shows us a first preview of our component how it will look like in rattleCAD
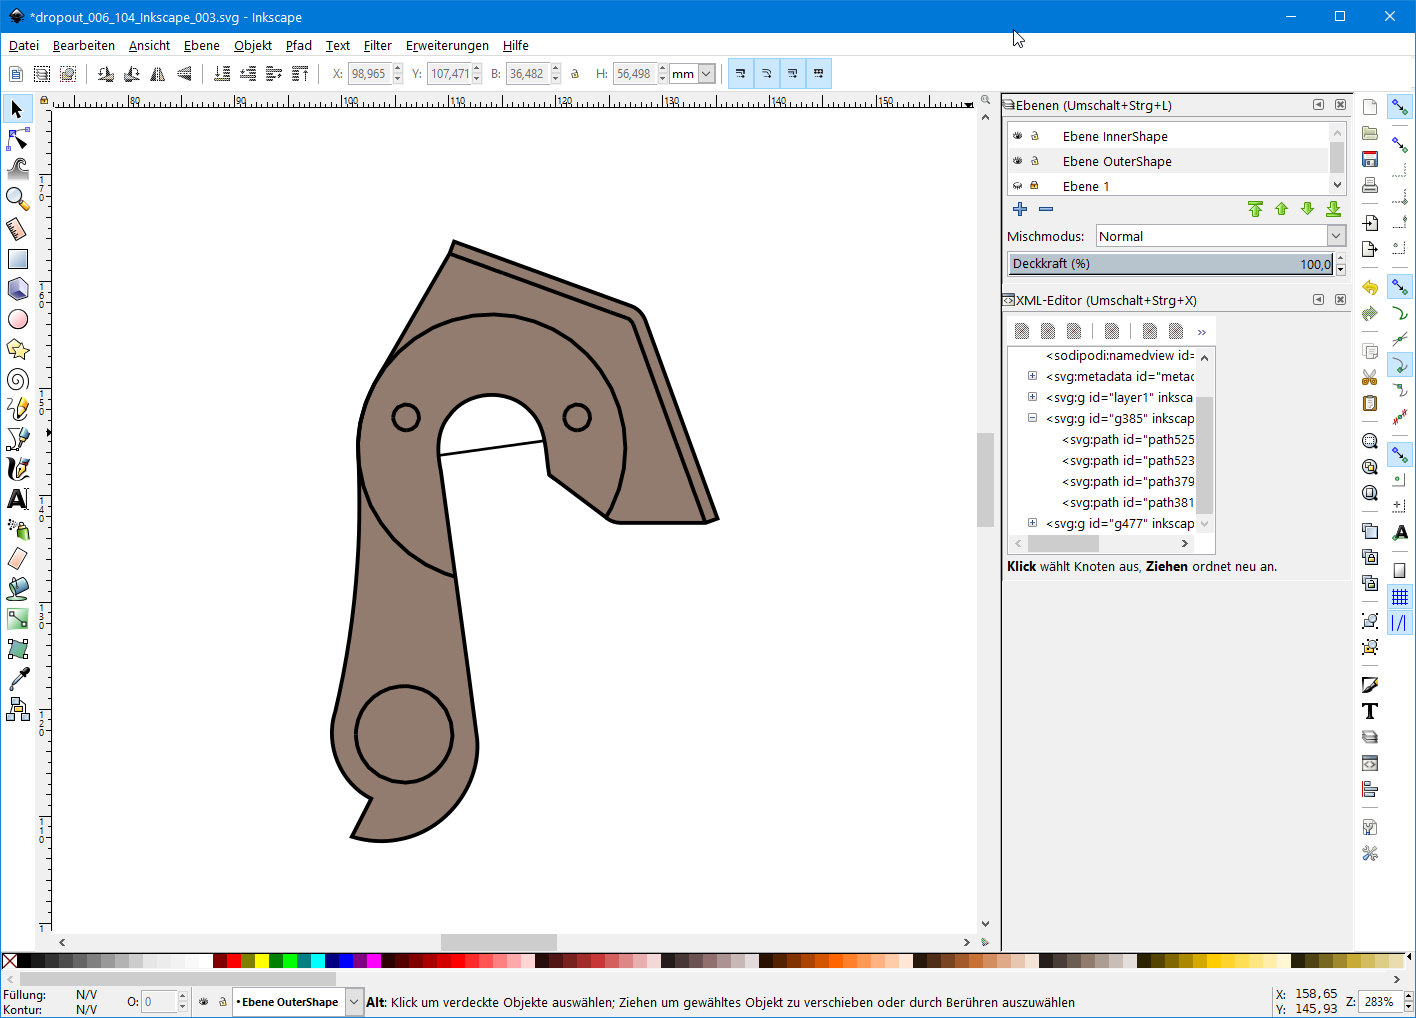
Result: dropout_006_104_Inkscape.svg
Prepare SVG-File for use in rattleCAD 4.0
- Step 7: Shape and Origin dropout_006_104_Inkscape_004_20191013_202555_2.svg
Preface
rattleCAD requires SVG-Documents that does not contain any path-nodes:
                            <path

                                id="path593"

                                d="m 449.76,409.36 -3.6,-1.12 -6.72,-3.12 -6.08,-4.08 -5.36,-4.96 -4.48,-5.68 -3.68,-6.24

                                .../>
instead of this rattleCAD can use polygon-nodes:
                            <polyline

                                fill="none"

                                stroke="#000000"

                                stroke-width="0.35983333"

                                points="126.72852,53.41493 125.18335,52.86458999999999"

                                id="path407_0"/>
additionaly we have to position our component (our dropout) at the axle of the rear wheel.
Therefor our SVG-Document needs one specific node to define the origin of our component, e.g. a circle with the attributes:
- id="center_00"
- cx="..."
- cy="..."
                            <circle

                                id="center_00"

                                cx="114.09202"

                                cy="65.575175"/>
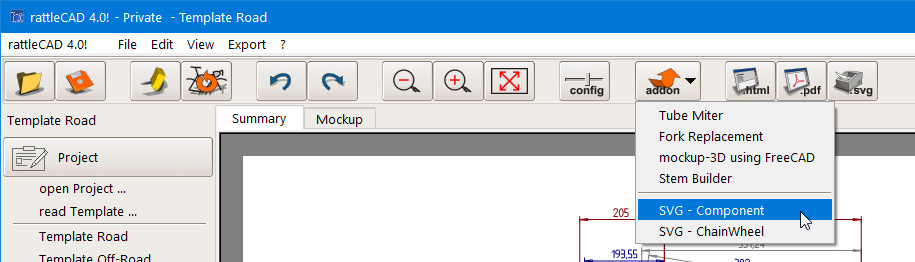
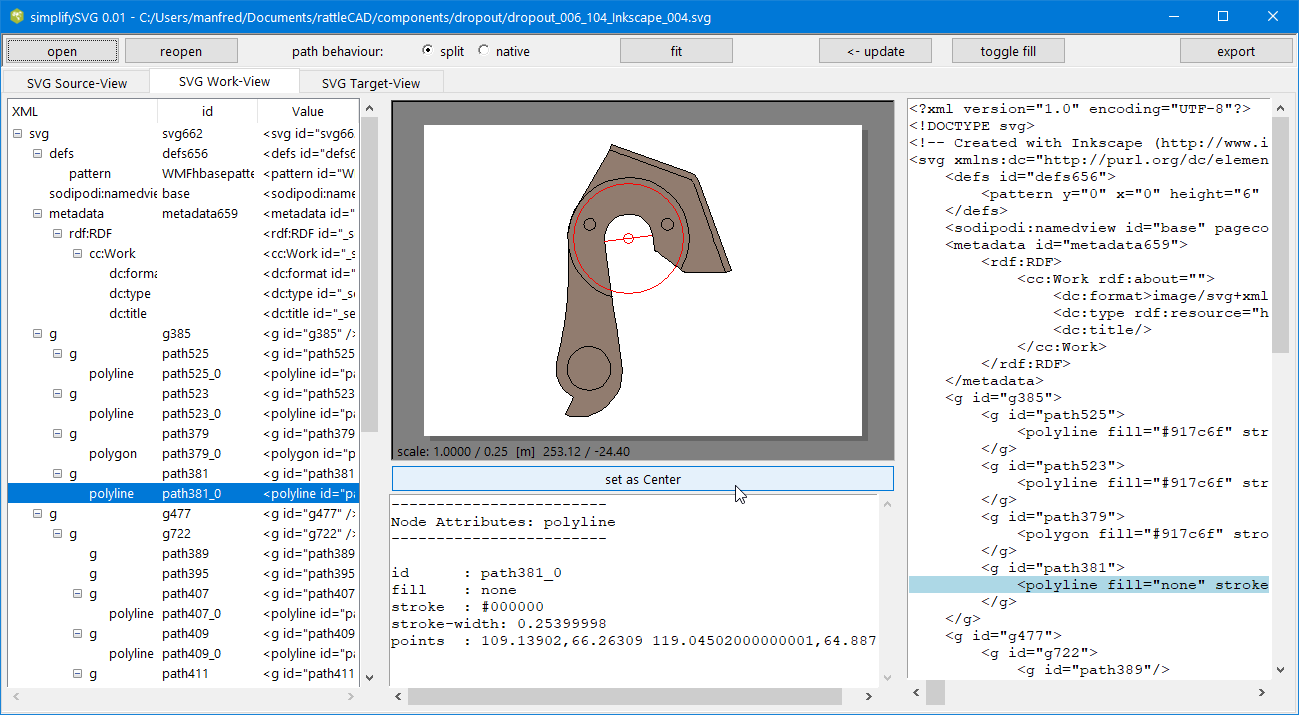
Tool
rattleCAD provides the tool: SVG - Component for the next step.
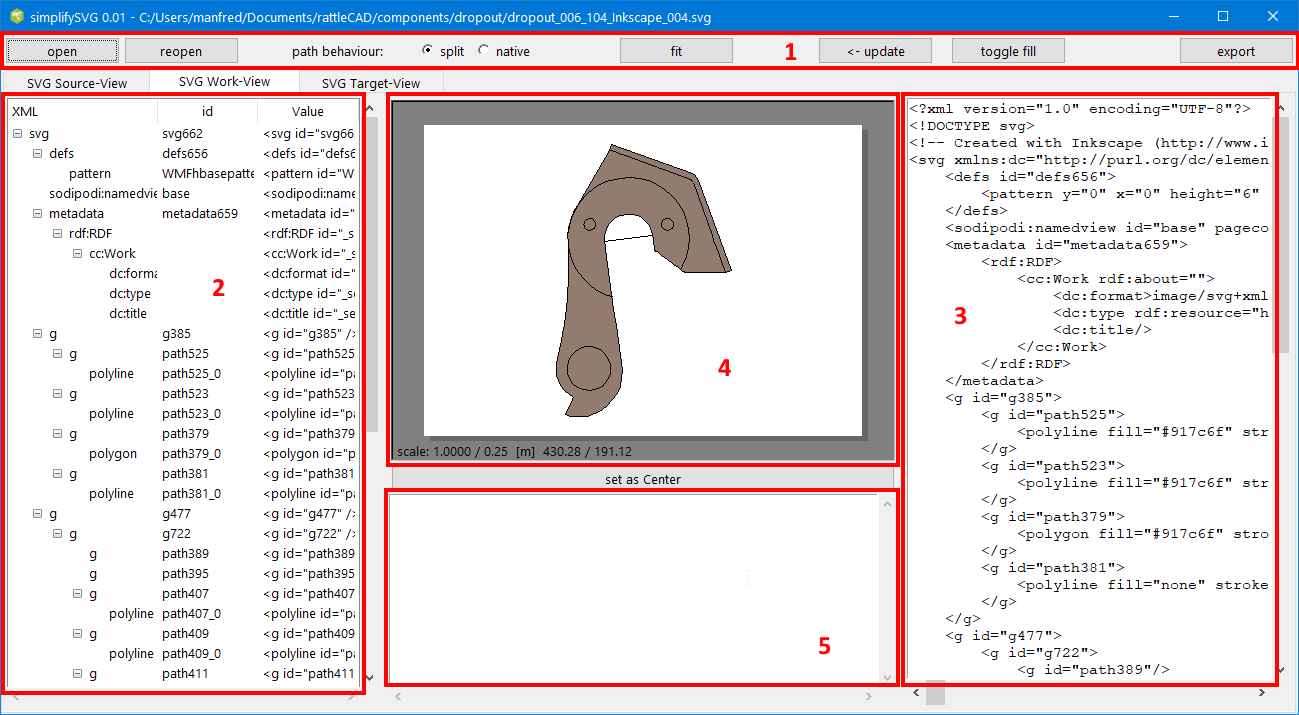
SVG - Component is structured in 5 important areas:
- 1 - Button Bar: to open, reopen, update and export your SVG-Files
- 2 - SVG-Document Structure: to navigate and select single SVG-Nodes
- 3 - SVG-Document Text: a plain text field with to edit your SVG-Document
- 4 - Canvas: to display the current SVG-Document
- 5 - Node Properties: information about the selected SVG-Node
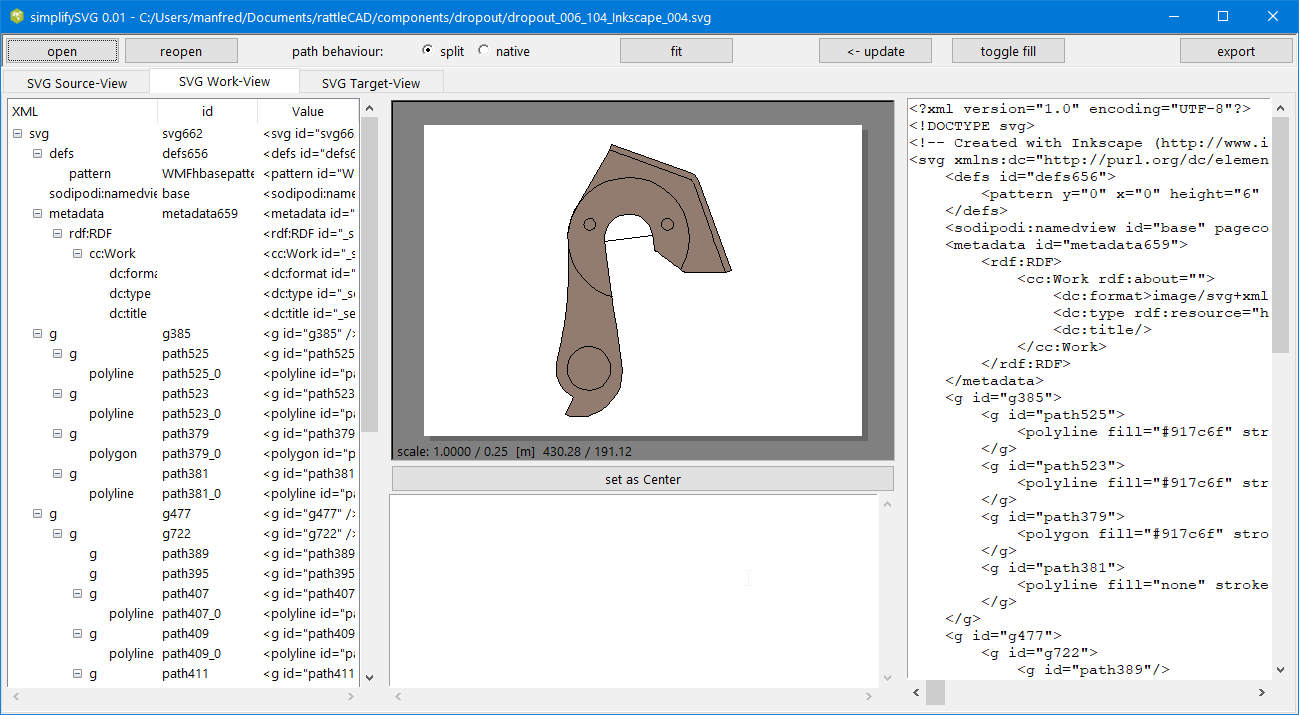
Step 7: Finish your SVG-Component
Open prepared file from step 6:
Select the Node to define the components Origin:
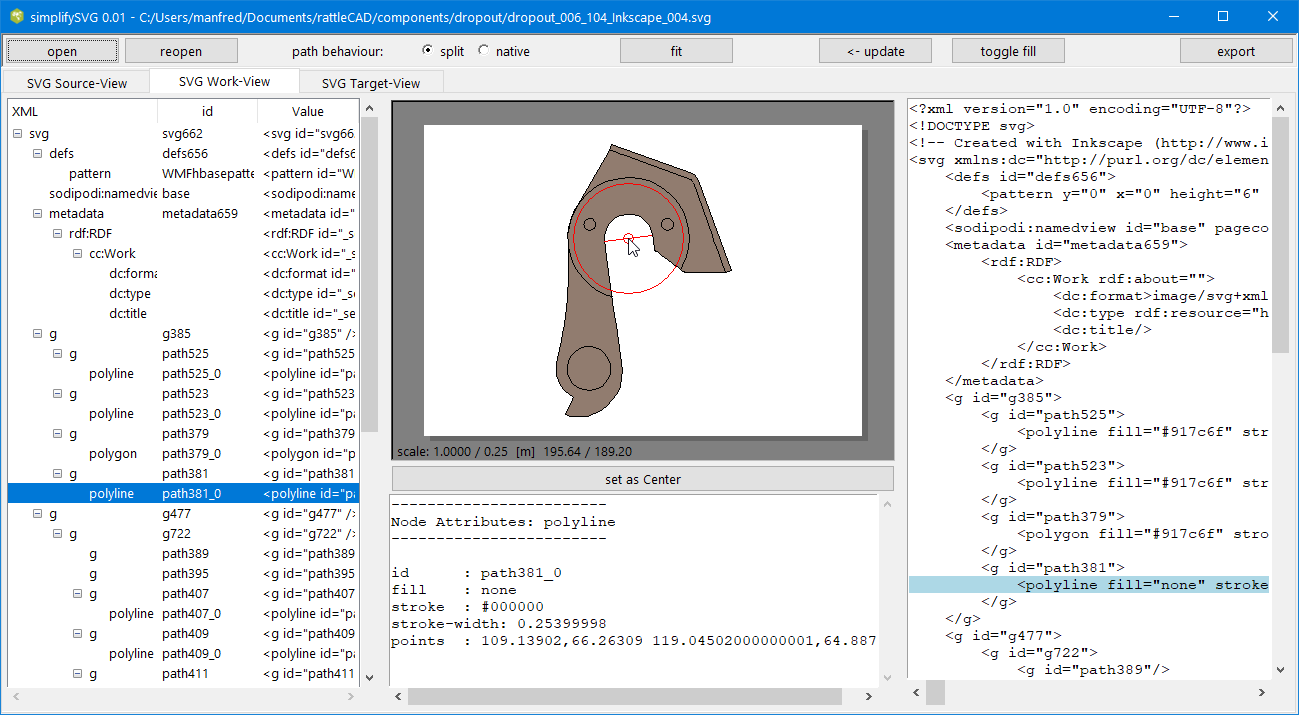
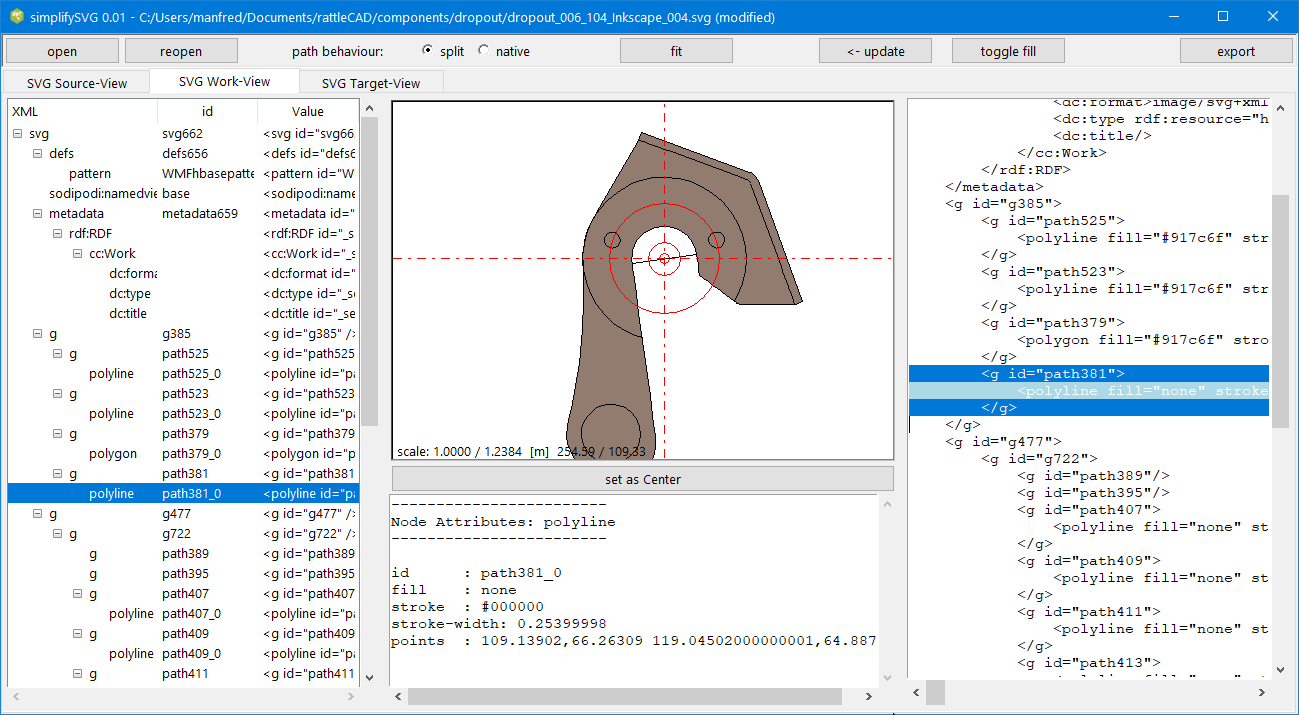
Use the selected Node to define the origin Node:
Update your canvas:

If not required anymore, select the Node that defined the components Origin:
select the marked Node in the 3 - SVG-Document Text and remove theses lines

... and remove theses lines
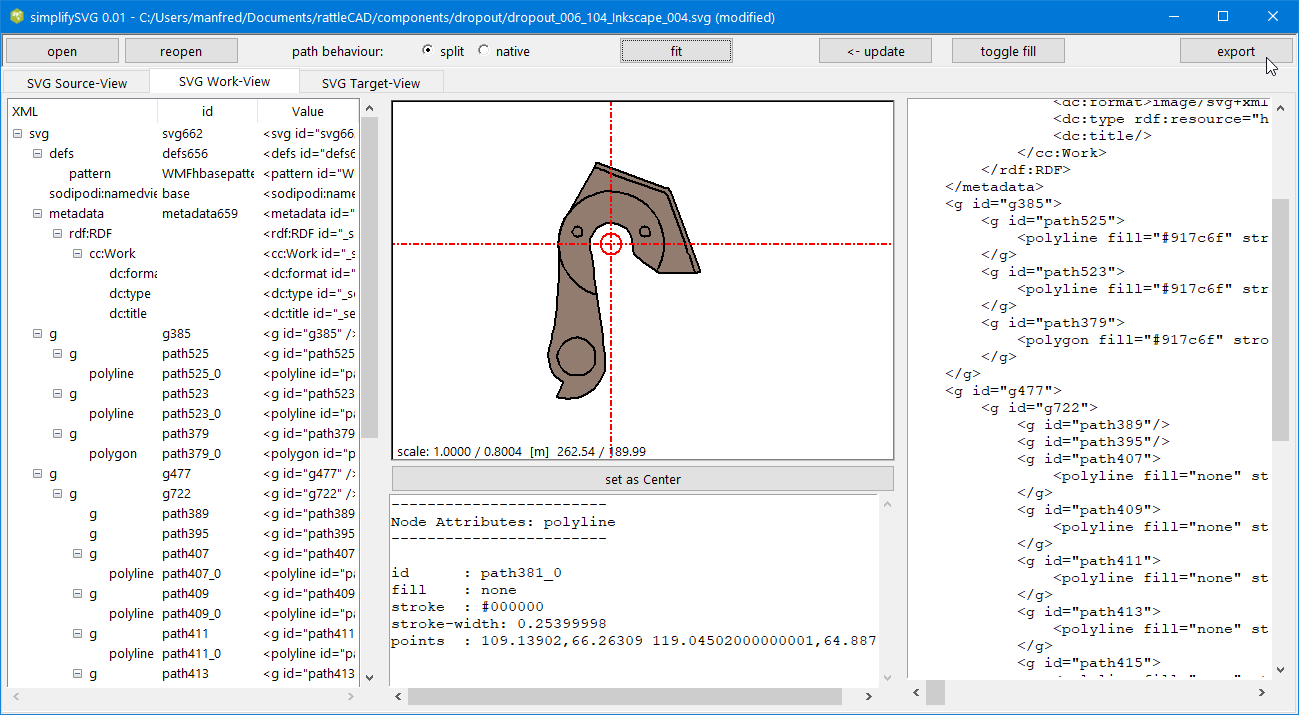
Export the current SVG-Document.
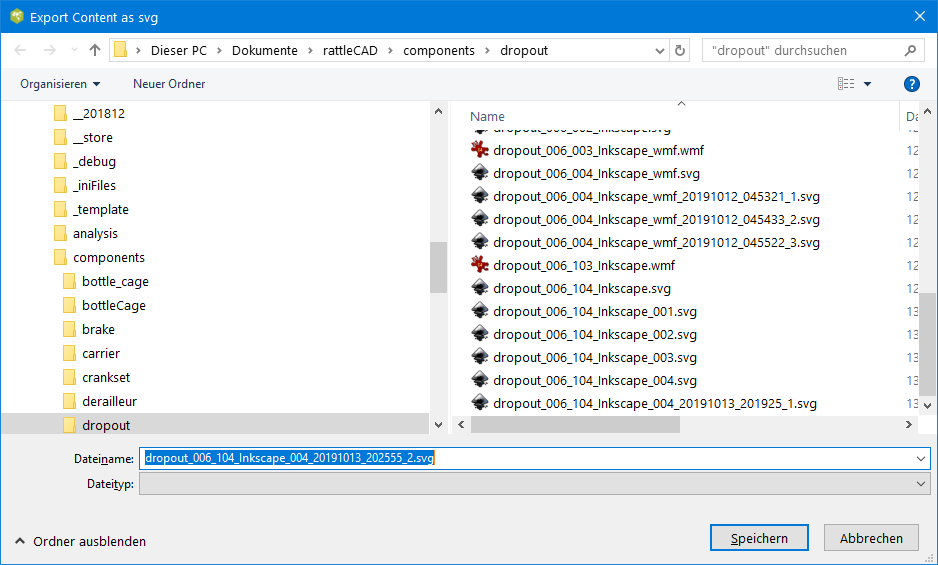
Result: dropout_006_104_Inkscape_004_20191013_202555_2.svg
Naming convention and cleanup of your rattleCAD 4.0 components directory
- Step 8: Rename dropout_006.svg
Preface
At the end we have to give our component file the indended name
to also work with the STP-Files for the addon: mockup-3D using FreeCAD.
- Result (2D): dropout_006.svg SVG-File to be used in rattleCAD 4.0
- Result (3D): dropout_006___right.stp right side dropout to be used in the plugin: mockup-3D using FreeCAD
- Result (3D): dropout_006___left.stp left side dropout to be used in ...
- Result (3D): dropout_006____miterShape.stp dropout cutting shape ...
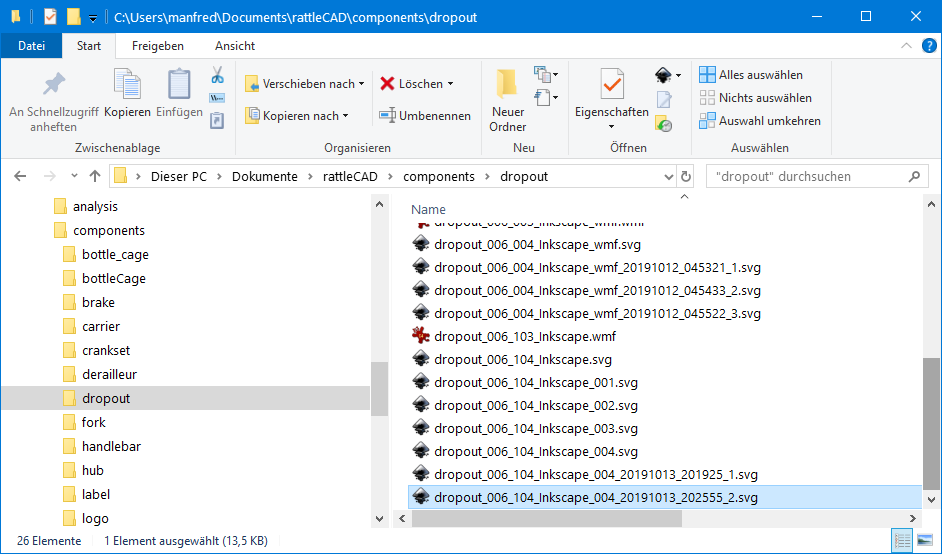
Step 8: Rename your SVG-Component
Rename your SVG File with the Windows Explorer, your Shell
or do it with Finder on MacOS and cleanup your directory if you want.

- Result (2D): dropout_006.svg SVG-File to be used in rattleCAD 4.0
- Result (3D): dropout_006___right.stp right side dropout to be used in the plugin: mockup-3D using FreeCAD
- Result (3D): dropout_006___left.stp left side dropout to be used in ...
- Result (3D): dropout_006____miterShape.stp dropout cutting shape ...
Result